
Lucid Cafe Bali – Serving Up Wisdom, One Culinary Tip at a Time!
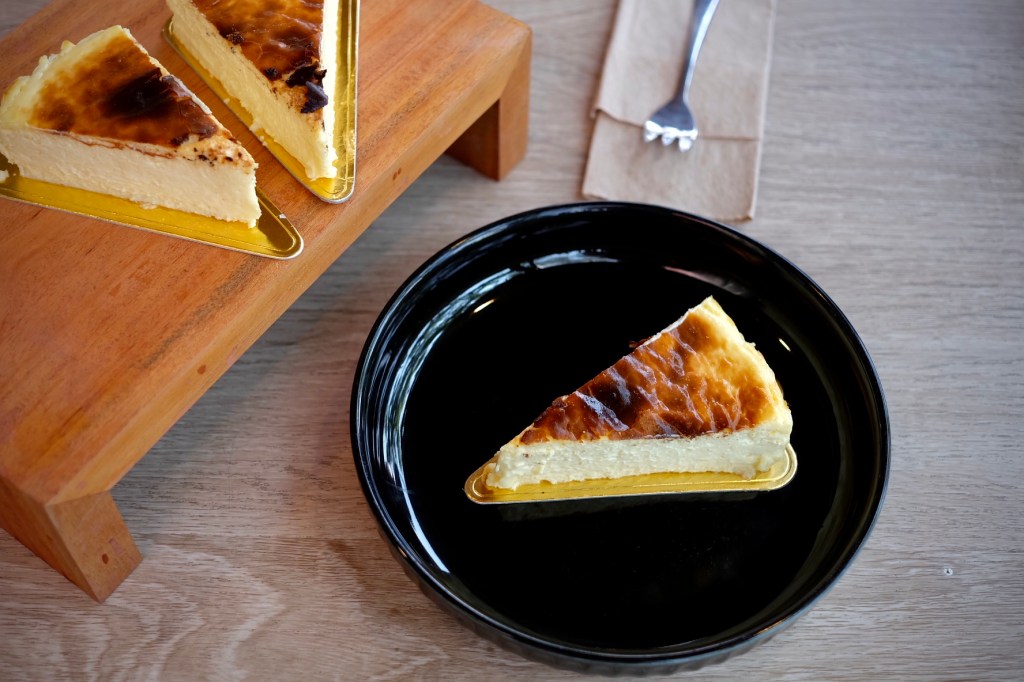
There’s something quietly magical about a cheesecake that isn’t perfect.
A slightly cracked top. A deeply caramelized surface. A center so creamy it almost melts before your fork even touches it.
That’s the beauty of our Original Burnt Cheesecake—a dessert that embraces imperfection and turns it into something unforgettable.
And today, we’re letting you in on the secrets so you can recreate that same magic at home.
🔥 What Makes a Burnt Cheesecake… Burnt (in a Good Way)?
Unlike traditional cheesecakes, this one isn’t about smooth, pale perfection.
The “burnt” top is intentional. It’s baked at a higher temperature, creating a rich, slightly bitter caramelized layer that perfectly balances the creamy, milky interior.
Think of it as contrast done right:
- Top: bold, caramelized, slightly smoky
- Inside: soft, creamy, and delicately cheesy
That balance is everything.
🧀 The Soul of It All: Ingredients That Matter
Before technique, let’s talk about feel.
A great burnt cheesecake doesn’t scream cheese—it whispers it.
Here’s what you’ll need:
- Cream cheese (room temperature, always!)
- Fresh cream (for that silky finish)
- Eggs (structure + richness)
- Sugar (just enough for balance)
- A touch of flour (for stability, not density)
- Vanilla (optional, but adds warmth)
Tip from our kitchen:
Don’t go overboard with the cheese. The goal is milky and creamy first, cheesy second to ensure you can balance the taste more flexibly.
🥄 The Process: Where Most People Get It Wrong
1. Don’t Overmix
You want a smooth batter, not an airy one.
Too much mixing = too much air = cracks and uneven texture.
Keep it gentle.
2. Embrace the Wrinkles (Literally)
Line your baking pan with parchment paper—but don’t make it neat.
Let it crinkle.
Those folds create the rustic, signature shape that makes burnt cheesecake feel homemade and authentic.
3. High Heat Is Your Best Friend
Bake at a higher temperature than a regular cheesecake.
This is what gives you that iconic dark top.
Don’t panic when it looks “too burnt.”
That’s exactly where the flavor lives.
4. The Jiggle Test > The Toothpick Test
Forget what you know about cakes.
When you take it out:
- The edges should be set
- The center should still jiggle slightly
That jiggle = creamy heaven once cooled.
❄️ The Waiting Game (Yes, It Matters)
This might be the hardest part.
Let it cool completely. Then chill it.
Why?
Because that’s when the texture transforms—from soft and airy to rich and creamy.
Pro move:
Leave it overnight in the fridge. The flavor deepens, the texture tightens, and everything just comes together.
🍰 Serving It the Right Way
Keep it simple. Always.
No heavy toppings needed. Let the cheesecake shine.
But if you want to elevate:
- A light dusting of powdered sugar
- Fresh berries for a hint of acidity
- Or just a clean slice on a dark plate (our favorite 😉)
💡 Final Thought: It’s Not About Perfection
The first time you make it, it might crack too much.
Or burn a little too dark.
Or feel too soft.
That’s okay.
Because the charm of a burnt cheesecake lies in its unpredictability.
Each one is slightly different.
Each one tells its own story.
And when you finally get that perfect balance—milky and cheesy with creamy texture—you’ll understand why we love it so much.
If you try this at home, don’t forget to share your version with us.
Because at the end of the day, great food isn’t just about recipes…
it’s about moments, experiments, and a little bit of courage to let things burn beautifully. ✨


Leave a comment